Tim thanks, sent an email to Paul already (found an older thread)...
I'd like to see the setup on the seat... when I looked at the drop on the seat, it'd have required about a 3 inch pedestal AND a 5" drop on the tiller (by the way I have 2 tiller drops if you are interested, looks like a 3" and a 5", for a Simrad, but looks like it might also work with the Raymarine). But I HAVE noticed that some have tillers that curve down, so maybe you do? I dunno. Once I get power setup on this, I'll do a quick picture and video of the completed config. I was quite worried about having the TP on the top combing (honestly still am)... but I've also seen it setup that way by another S2 owner, so can't be all bad.
Rambling repair post...
Moderators: Tim Bosma, Tom Elsen
-
SailingUphill

- Posts: 205
- Joined: Fri Aug 17, 2012 1:52 pm
Re: Rambling repair post...
Presently hull 399, "Ragtime" Blackwater Yacht Racing, Smith Mountain Lake, VA
Fomerly hull 68,"Rum Line," Paupack Sail Club, Lake Wallenpaupack, PA.
Fomerly hull 68,"Rum Line," Paupack Sail Club, Lake Wallenpaupack, PA.

Re: Rambling repair post...
Uphill,
I dislike the combing top for 2 reasons, 1. it seems harder to do the work for mounting there than the seat, and B. it feels more vunerable to crew movement. My plan it to put a short riser on the seat which can be removed leaving only a small disk to imprint my skipper's backside,,, he usually sits up on deck anyway. then use a drop bracket on the tiller. At 1 cubit (18") from the pivot point, I don't feel it will intrude on our sailing. I'll start taking pics as we finish the planning stage and move into the fit.
Right now she is in the barn at 6 F (which feels like -3F).
thanks,
-
SailingUphill
- Posts: 205
- Joined: Fri Aug 17, 2012 1:52 pm
Re: Rambling repair post...
Well I finished my run of power for the tiller pilot, and was able to test it. I think I'd have preferred the seat position like you propose, but I'll try it this way for now. Here is the test...
http://youtu.be/u7oEqz1EUyM
http://youtu.be/u7oEqz1EUyM
Presently hull 399, "Ragtime" Blackwater Yacht Racing, Smith Mountain Lake, VA
Fomerly hull 68,"Rum Line," Paupack Sail Club, Lake Wallenpaupack, PA.
Fomerly hull 68,"Rum Line," Paupack Sail Club, Lake Wallenpaupack, PA.
-
SailingUphill
- Posts: 205
- Joined: Fri Aug 17, 2012 1:52 pm
Re: Rambling repair post...
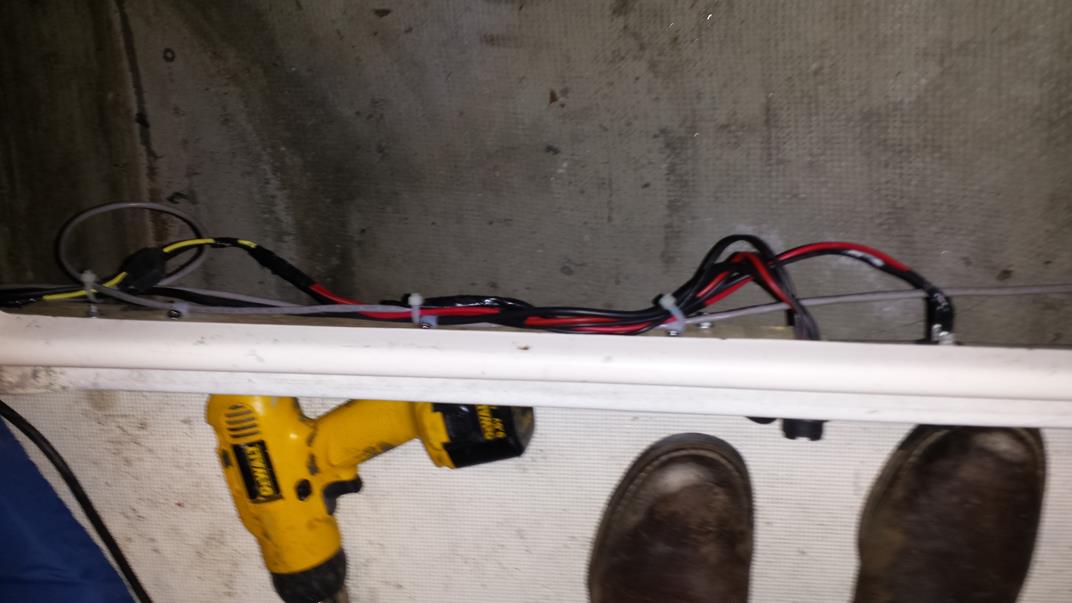
Tidying up wiring... All the wiring is done... NMEA 0183, from tiller pilot to VHF/DSC/GPS, Simnet from Tiller Pilot to simnet block under steps... power, speakers, etc..
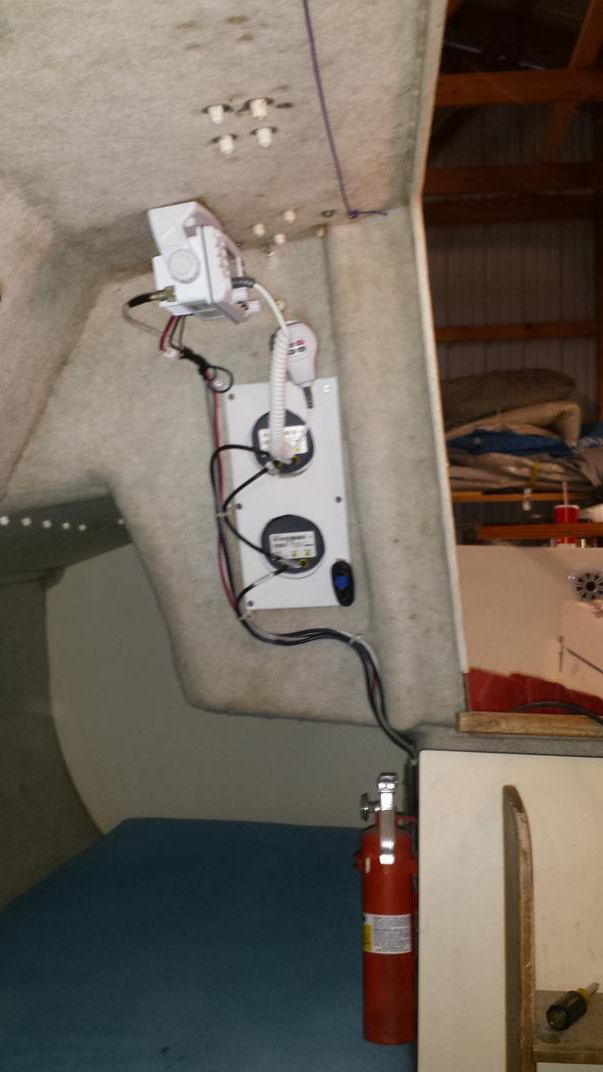
Also tiller pilot socket and 12V aux socket all wired up and tidied up. Boat is closed up and cleaned up..
Next projects are to finish up and gelcoat the fiberglass repair. do a couple of gelcoat repairs on the port side... Sand, prime and paint mast and spreaders, new halyards, finally burnish and coat the boat bottom with VC17... that's about all I have time for now.
The wiring being done was huge though.
Presently hull 399, "Ragtime" Blackwater Yacht Racing, Smith Mountain Lake, VA
Fomerly hull 68,"Rum Line," Paupack Sail Club, Lake Wallenpaupack, PA.
Fomerly hull 68,"Rum Line," Paupack Sail Club, Lake Wallenpaupack, PA.
-
SailingUphill
- Posts: 205
- Joined: Fri Aug 17, 2012 1:52 pm
Re: Rambling repair post...
Well I am really waiting for the temps to come up before I attack that seat again. I have the gelcoat ordered from Minicraft, should see it sometime this week. I also found an LED replacement bulb for the masthead from Catalinadirect. Will link here.
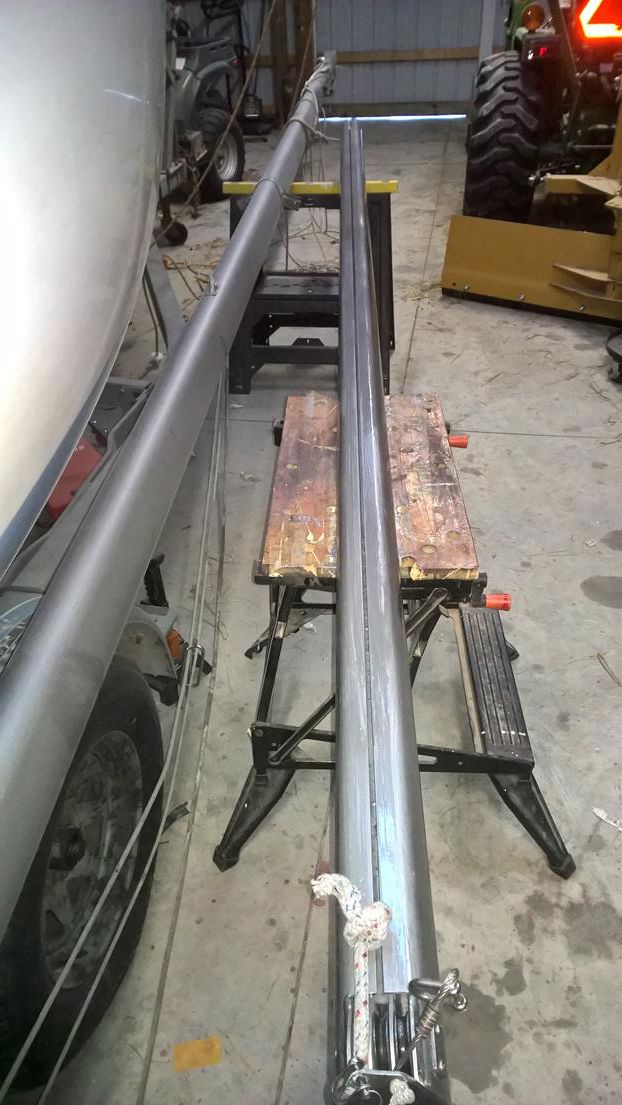
But I've upgraded my random orbital sander, to a dewalt, my crappy skill sander wasn't cutting it for the mast... What was taking hours upon hours, took about 1 day to sand down the mast/boom.. Here's the mast after sanding.
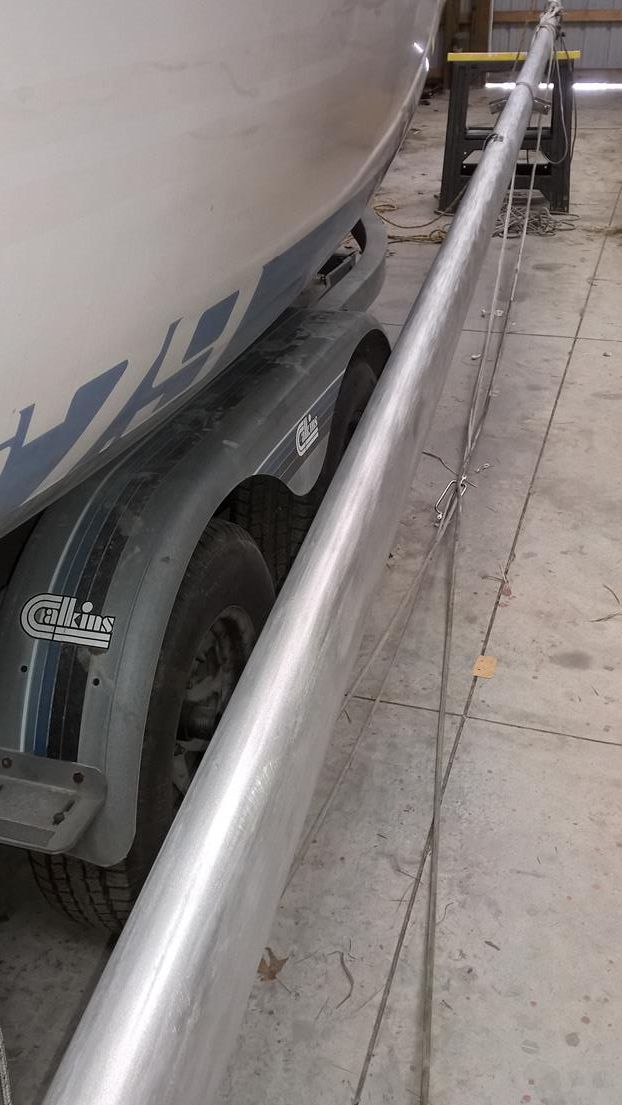
Here are the mast and boom primed and ready. Yes the primer is silver (not sure who the genius was who decided that was a good idea, but OK)...
I started 2 side projects too while I was working on this... One is an "armrest" to go below the radio, the other is a "box" to enclose the wires in the head for a 2nd electrical panel. You see I've run out of "fused switches" to use for new electronics, and my boat didn't have a "Steaming" light, or a spreader/deck light. The new panel, has provisions for 2 batteries, with meters, an extra 12V outlet, and a couple more switches. More on that soon.
But I've upgraded my random orbital sander, to a dewalt, my crappy skill sander wasn't cutting it for the mast... What was taking hours upon hours, took about 1 day to sand down the mast/boom.. Here's the mast after sanding.
Here are the mast and boom primed and ready. Yes the primer is silver (not sure who the genius was who decided that was a good idea, but OK)...
I started 2 side projects too while I was working on this... One is an "armrest" to go below the radio, the other is a "box" to enclose the wires in the head for a 2nd electrical panel. You see I've run out of "fused switches" to use for new electronics, and my boat didn't have a "Steaming" light, or a spreader/deck light. The new panel, has provisions for 2 batteries, with meters, an extra 12V outlet, and a couple more switches. More on that soon.
Presently hull 399, "Ragtime" Blackwater Yacht Racing, Smith Mountain Lake, VA
Fomerly hull 68,"Rum Line," Paupack Sail Club, Lake Wallenpaupack, PA.
Fomerly hull 68,"Rum Line," Paupack Sail Club, Lake Wallenpaupack, PA.
-
SailingUphill
- Posts: 205
- Joined: Fri Aug 17, 2012 1:52 pm
Re: Rambling repair post...
Bottom has been smoothed down with a palm sander, and VC17m applied. So things are getting done this weekend.
As you can see the old VC17m was really pretty much gone.

Here is the bottom complete.. I think it really turned out well.. I might do another 2 coats.

As you can see the old VC17m was really pretty much gone.
Here is the bottom complete.. I think it really turned out well.. I might do another 2 coats.
Presently hull 399, "Ragtime" Blackwater Yacht Racing, Smith Mountain Lake, VA
Fomerly hull 68,"Rum Line," Paupack Sail Club, Lake Wallenpaupack, PA.
Fomerly hull 68,"Rum Line," Paupack Sail Club, Lake Wallenpaupack, PA.
Re: Rambling repair post...
I couldn't help but notice your bottom coat pictures show that your trailer is equipped with rollers. Most S2's that I have seen have trailers with carpeted bunks in various layouts. So, I'm wondering, since I was planning on rebuilding my trailer this summer which is really better, bunks or rollers? Which makes landing and launching easier, which does less harm to your paint job, etc. pro's and con's. What do you think?
-
LarryE-old
- Posts: 233
- Joined: Fri Jun 27, 2003 12:06 pm
Re: Rambling repair post...
I have an alum. float on trailer with carpeted bunks.
Best thing I ever bought. Float the boat on, hook up the eye and drive away.
Launched the boat today after touching up the bottom.
Going sailing tomorrow.
Going to be 82 and sunny
Best thing I ever bought. Float the boat on, hook up the eye and drive away.
Launched the boat today after touching up the bottom.
Going sailing tomorrow.
Going to be 82 and sunny
Purr-Fect
262
262
-
SailingUphill
- Posts: 205
- Joined: Fri Aug 17, 2012 1:52 pm
Re: Rambling repair post...
Well I launched with a bunk trailer, and retrieved with the roller. So far the roller seems lots better. But this trailer more properly fits the S2 than the old one. The older trailer was actually overly large for the boat.
The rollers sure make it easier to get to the bottom. I can roll the boat back 1-2" and paint all the missed spots too.
Unfortunately this trailer isn't perfect either. I'll be needing to replace the rollers on this trailer a couple at a time, they are starting to split.
The rollers sure make it easier to get to the bottom. I can roll the boat back 1-2" and paint all the missed spots too.
Unfortunately this trailer isn't perfect either. I'll be needing to replace the rollers on this trailer a couple at a time, they are starting to split.
Presently hull 399, "Ragtime" Blackwater Yacht Racing, Smith Mountain Lake, VA
Fomerly hull 68,"Rum Line," Paupack Sail Club, Lake Wallenpaupack, PA.
Fomerly hull 68,"Rum Line," Paupack Sail Club, Lake Wallenpaupack, PA.
-
SailingUphill
- Posts: 205
- Joined: Fri Aug 17, 2012 1:52 pm
Re: Rambling repair post...
You folks getting tired of this post yet? heheheheh...
Some more news... I opted for the cheap (free) route fixing my spreaders.
I think I posted this picture before, of one of my spreaders, after I ground the paint off... Looks like freeze/thaw cycling split it.
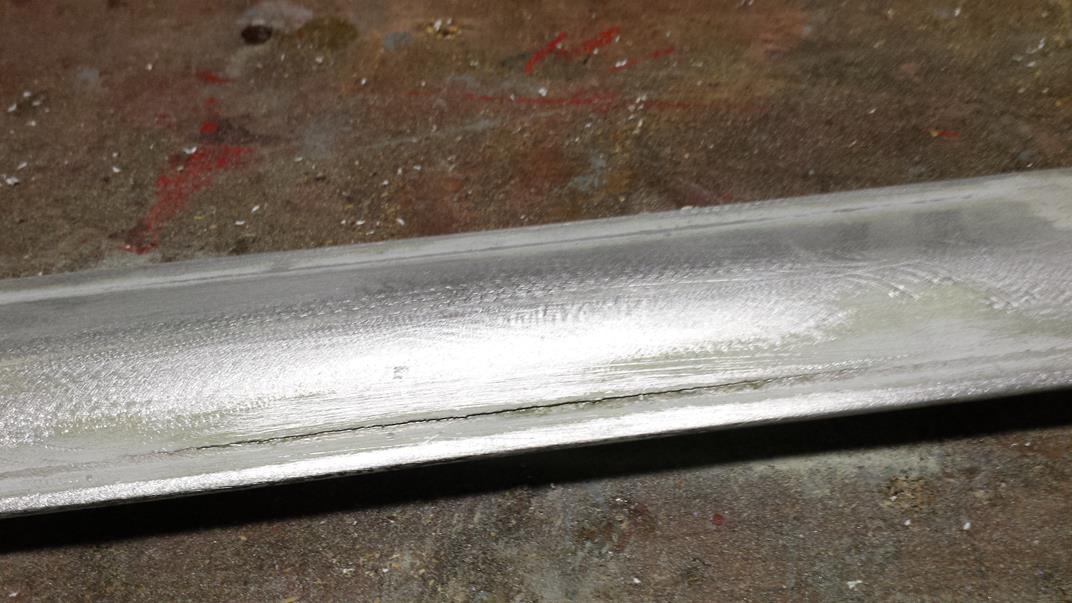
AS luck would have it our maintenance department just got new welding equipment, and they hadn't tried to do any welding yet on aluminum. I setup one of the guys home networks for him, including a pretty sweet security system he bought... so they did this for me in their spare time...

They may not be ready to weld aircraft, but for me it was a HUGE win! I'll be adding some "weep holes" to the spreaders before painting now, to prevent this in the future. But this was a huge step forward for me because I didn't have the $250 for new spreaders. But I gotta say it is nice that the association has secured some for us in case these were beyond hope.
Some more news... I opted for the cheap (free) route fixing my spreaders.
I think I posted this picture before, of one of my spreaders, after I ground the paint off... Looks like freeze/thaw cycling split it.
AS luck would have it our maintenance department just got new welding equipment, and they hadn't tried to do any welding yet on aluminum. I setup one of the guys home networks for him, including a pretty sweet security system he bought... so they did this for me in their spare time...
They may not be ready to weld aircraft, but for me it was a HUGE win! I'll be adding some "weep holes" to the spreaders before painting now, to prevent this in the future. But this was a huge step forward for me because I didn't have the $250 for new spreaders. But I gotta say it is nice that the association has secured some for us in case these were beyond hope.
Presently hull 399, "Ragtime" Blackwater Yacht Racing, Smith Mountain Lake, VA
Fomerly hull 68,"Rum Line," Paupack Sail Club, Lake Wallenpaupack, PA.
Fomerly hull 68,"Rum Line," Paupack Sail Club, Lake Wallenpaupack, PA.
Re: Rambling repair post...
Uphill,
Not tired of this at all. Keep it coming, it helps the Class.
Thanks,
Not tired of this at all. Keep it coming, it helps the Class.
Thanks,
Re: Rambling repair post...
My login got screwed up, so I created a new one.
But I'm still plugging away. My gelcoat came in this week (Thanks to Stef for the heads up Minicraft of FL, ermine white) I bought a quart had them add wax per his suggestion. Looks like it'll warm up to about 50 this week, with my heater, I should be warm enough in the pole barn to attempt my first coat of gelcoat on that port seat.
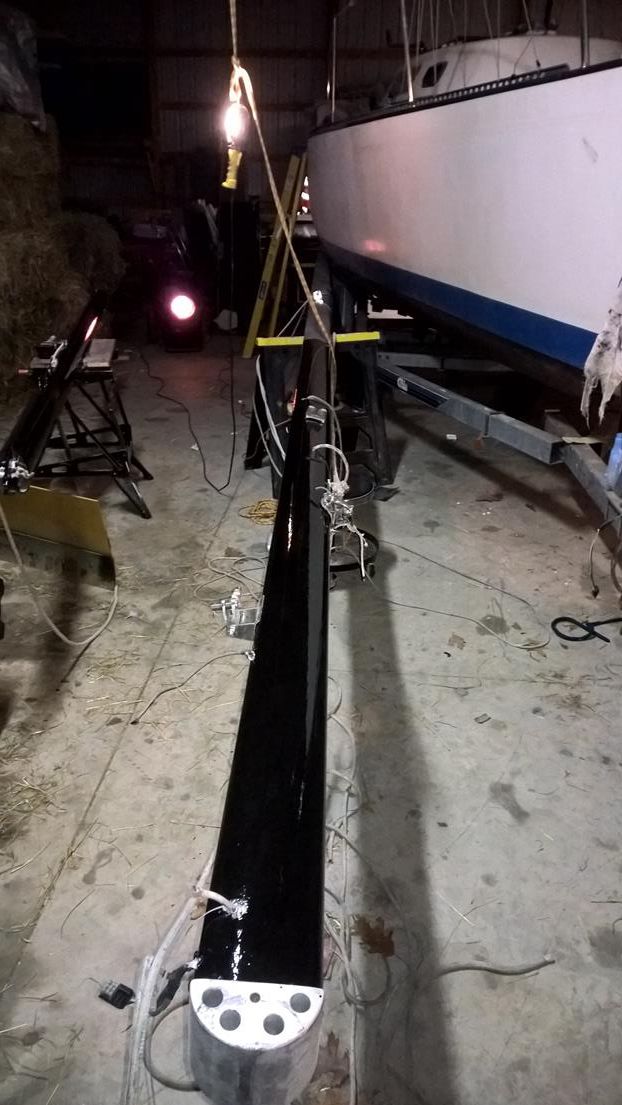
Meanwhile, this past week, I finished my first coat of paint on the mast. Yep I went unconventional, with black. Nope its not going to be a stellar paintjob, but it should be considerably better than before. First coat always scares me, never looks great. I hope I can get away with only 2 coats.
But I'm still plugging away. My gelcoat came in this week (Thanks to Stef for the heads up Minicraft of FL, ermine white) I bought a quart had them add wax per his suggestion. Looks like it'll warm up to about 50 this week, with my heater, I should be warm enough in the pole barn to attempt my first coat of gelcoat on that port seat.
Meanwhile, this past week, I finished my first coat of paint on the mast. Yep I went unconventional, with black. Nope its not going to be a stellar paintjob, but it should be considerably better than before. First coat always scares me, never looks great. I hope I can get away with only 2 coats.
Re: Rambling repair post...
I still need to run my wind transducer cable up the mast, and of course replace halyards. I'm debating adding a steaming/deck light in the mix. Looks like it had something mounted there at one point. Not sure about that though... times getting tight.
you might notice I'm making a dent in getting the chalk gone on the hull. Yeah I'm going to patch some of the wounds on the hull with any leftover gelcoat I might have.
What I started with...

Where I am at now... I've only worked on the first few feet of the starboard bow... trying to see what works best to get shine back. It appears it's sand with 250 grit dry paper, then wet sand with 400, then wet sand with 600, then compound twice, then wax. That gets me about 90% back, and infinitely better than it was before.
So I have a plan, but it was on hold while I painted the mast. I'm going to leave the mast at 1 coat for now, wire it, halyards and such then put the 2nd coat on in a couple weeks.
you might notice I'm making a dent in getting the chalk gone on the hull. Yeah I'm going to patch some of the wounds on the hull with any leftover gelcoat I might have.
What I started with...
Where I am at now... I've only worked on the first few feet of the starboard bow... trying to see what works best to get shine back. It appears it's sand with 250 grit dry paper, then wet sand with 400, then wet sand with 600, then compound twice, then wax. That gets me about 90% back, and infinitely better than it was before.
So I have a plan, but it was on hold while I painted the mast. I'm going to leave the mast at 1 coat for now, wire it, halyards and such then put the 2nd coat on in a couple weeks.

Re: Rambling repair post...
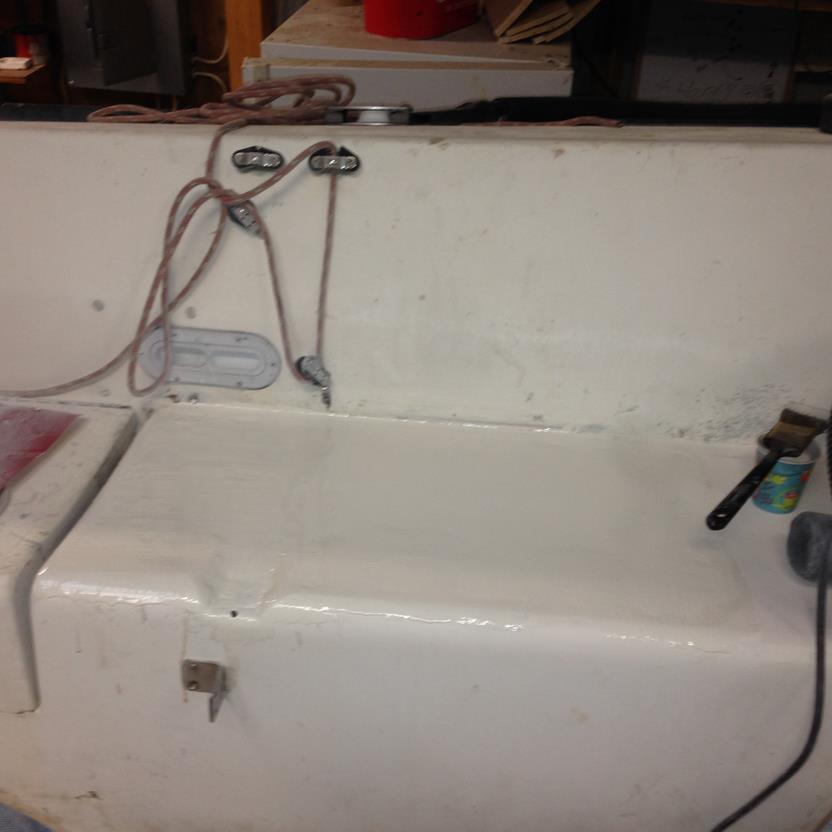
More work done... Sanded down the last coat of fiberglass on the repair spot.
Gelcoated... cause it was 55 degrees here, and with my salamander heater, it was 75 in the pole barn!!! YEAH... and guess what saw my first house fly! what really? Can't make this up.
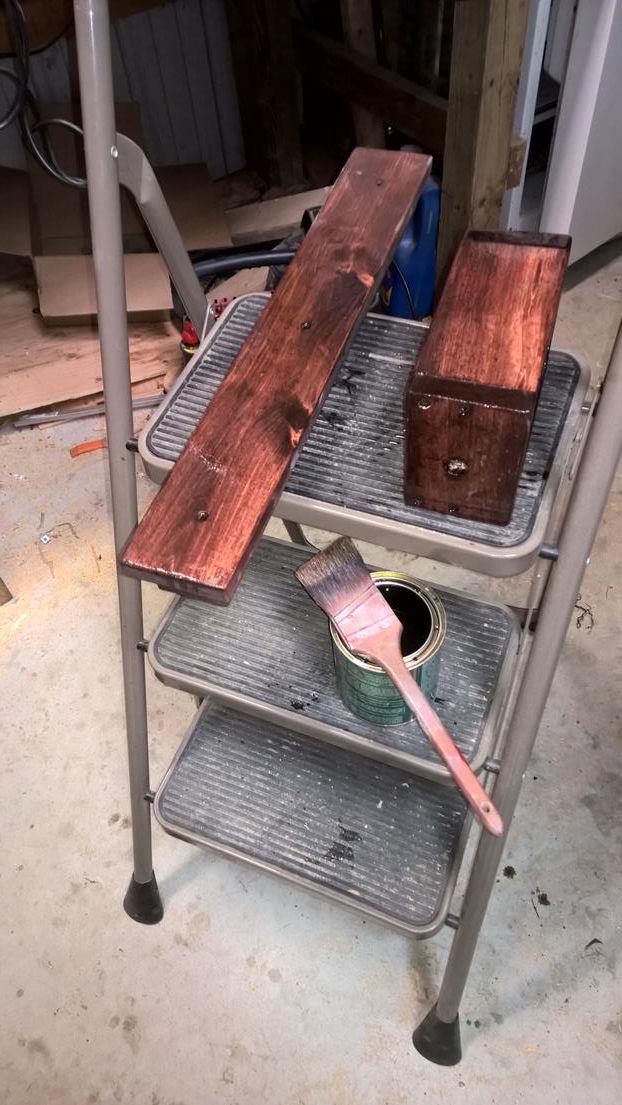
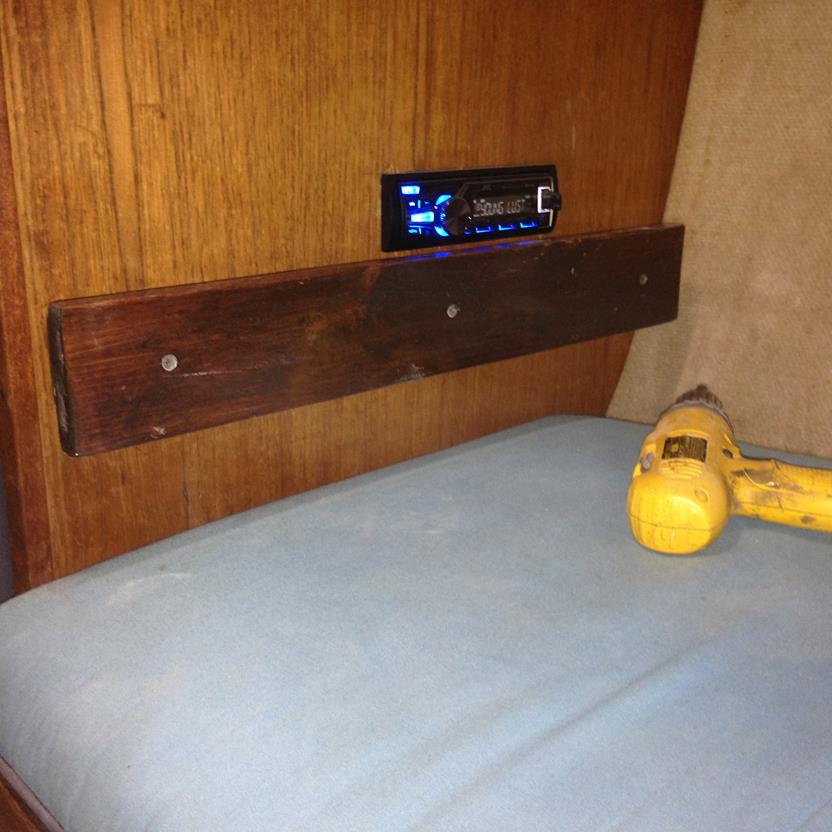
My new armrest to protect the face of the stereo -cause the location I picked wasn't perfect for exposure, but was for being able to hit it from the cockpit with the remote. It's just pine, but what the hey, it looks OK...
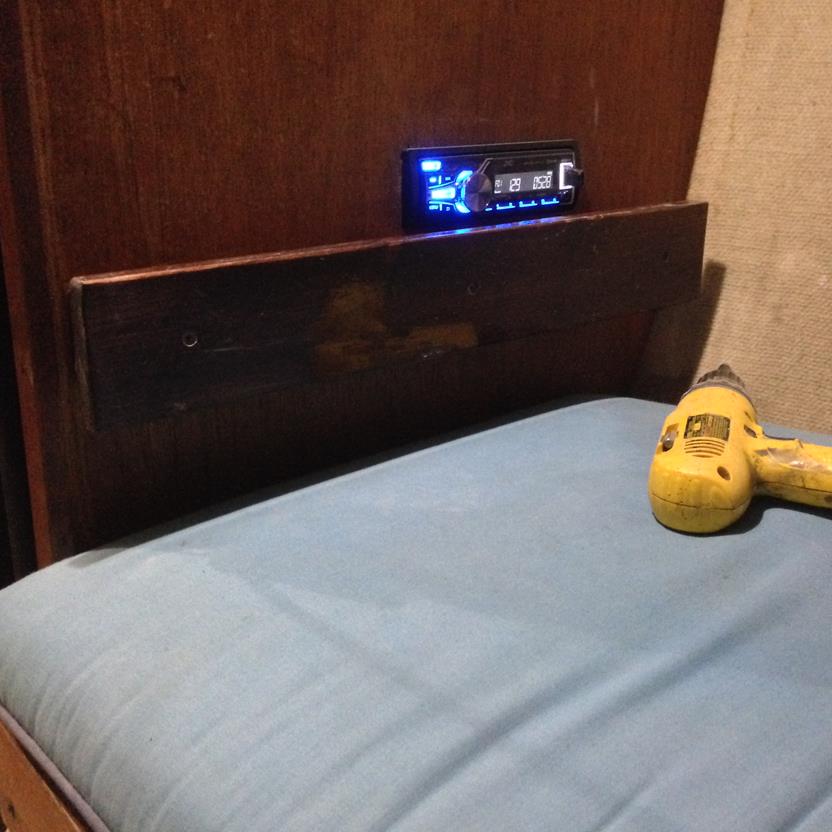
The stain doesn't perfectly match of course, but it also isn't as bad as THIS picture.
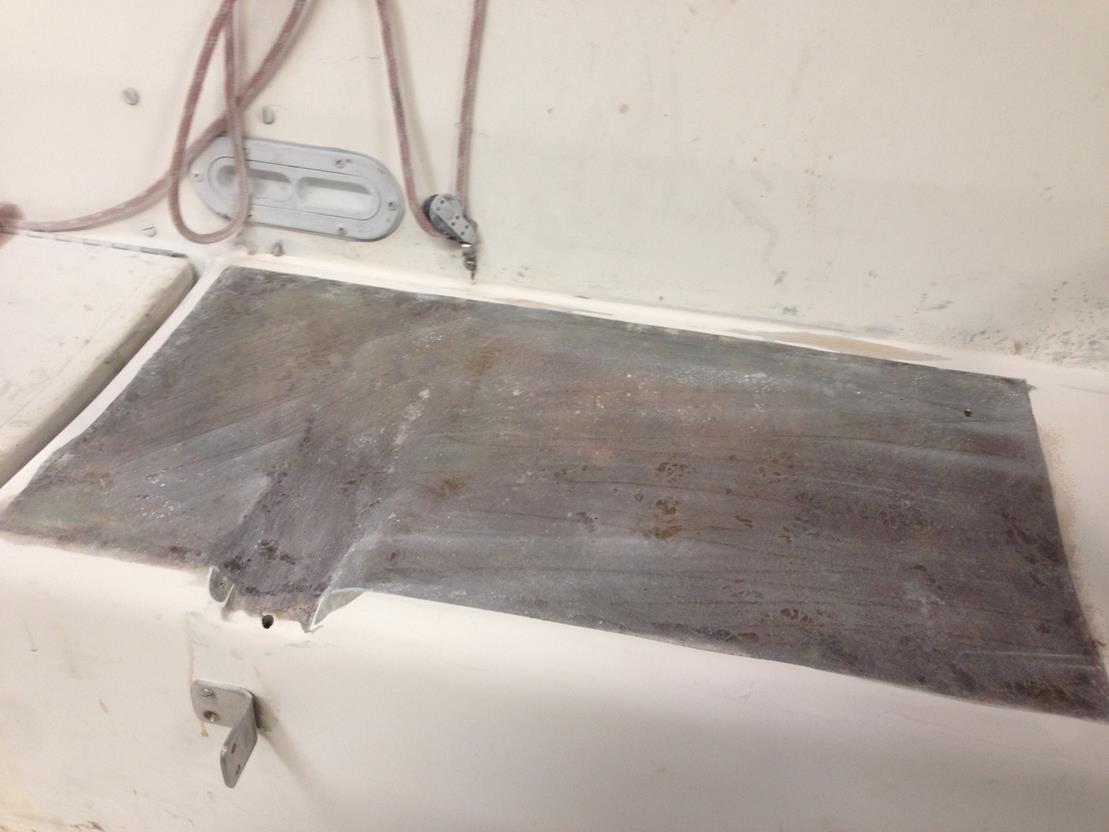
Ok so once I get the port cockpit seat squared away, the next thing I'd like to slap a coat of gelcoat on is a real poor repair job done years ago to the port side. They gelcoated with the wrong color, and there were air bubbles in it, as well as highs and lows.. structurally it looks ok (can't tell from inside). But this is a large "patch"....

Gelcoated... cause it was 55 degrees here, and with my salamander heater, it was 75 in the pole barn!!! YEAH... and guess what saw my first house fly! what really? Can't make this up.
My new armrest to protect the face of the stereo -cause the location I picked wasn't perfect for exposure, but was for being able to hit it from the cockpit with the remote
The stain doesn't perfectly match of course, but it also isn't as bad as THIS picture.
Ok so once I get the port cockpit seat squared away, the next thing I'd like to slap a coat of gelcoat on is a real poor repair job done years ago to the port side. They gelcoated with the wrong color, and there were air bubbles in it, as well as highs and lows.. structurally it looks ok (can't tell from inside). But this is a large "patch"....