
Rambling repair post...
Moderators: Tim Bosma, Tom Elsen
Re: Rambling repair post...
This morning the repair looks pretty good.. still wet in a few places, but at least I'm making progress. I hope to be able to do coat number 2 in the future. I'm actually looking online for a non-skid mold I can use to pattern the nonskid back... I think I found one if it's under $100, I'll maybe pick it up. Otherwise I might improvise something. I really am not worried much about what it looks like just wanna give it some teeth so it's not an ice skating rink in the wet.
Re: Rambling repair post...
Take the non-skid very seriously. There have been serious falls on 7.9's in the "wet."
Re: Rambling repair post...
There aren't good pictures that tell the true story of what I got done this weekend, but lots accomplished.
The wind transducer cable was run up the mast... It looks off center in this picture but I've measured it against centerline and it's fine... Note I pulled the anchor light to get to the bolts. I wound up cutting a 1" x 3/4" rectangle hole directly below this vane mount, so that I could reach in and grab the main halyard (my feeder line). I used the main halyard to pull through a smaller diameter twine in its place (and I looped it top to bottom so it was continuous)... I used a set of forecepts to reach into the hole in the top of the mast to grab the small diameter line, up through the new rectangle hole. This particular mount runs the cable through the center, and out the back, the vane then has a 12 inch arm that clicks into place.

Here's a Mr. Fuzzycam picture of the masthead in place. You might notice I've sanded the mast and am ready for a 2nd coat of paint.

Closeup... of the masthead, you'll see the new LED anchor light.. this is before I secured the coax for the VHF...

This is all I did for the exit location at the bottom of the mast... I'll admit that I was nervous cutting the SIMNET cable since replacing the 50ft cable is about $100... but this is a trailer sailor after all and there has to be a way to "disconnect."

By the way, I tested the anchor light using my ATV battery (about 4 feet from the base of the mast) to make sure it works.. none of the pictures turned out, but it's bright, and it's a nice yellow/white like the original incandescent, the Dr. LED, perko anchor light bulb from catalinadirect.com was a good match.
The original wiring through the hull of the boat for the mast was retro-fitted with a 4-way trailer plug connector, and then someone later added the VHF... I managed to place the transducer wire (simnet) through the deck between the two (and seemingly out of the way), which puts the cable behind the daggerboard trunk, on the starboard V-berth bulkhead... Here's a shot of the deck (again shiny one in the middle is new):

Here's a shot of the cabin side. I used 5200 under the through deck fitting, as well as screws...

You have to ask yourself, what I did to connect the now cut cable (simnet), and as it turns out simnet is NMEA2000 "similar," which basically shares the same wires, just different connectors (actually smaller connectors)... so what I bought was Maretron Micro Field Connectors. I bought 1 male and 1 female connectors and the wire colors matched exactly. http://www.defender.com/product3.jsp?pa ... &id=750951
The result was pretty good.

By the way somewhere during all this, I waxed the starboard side hull... It turned out better than I expected, but I can't seem to get a decent shot of it.

After all of this I stumbled across my charging circuit from my outboard. I noted that the person who ran the wire didn't put an inline fuse in it... or a disconnect... What is worse (and scary) is the wire (which I used myself) was apparently shorted at one point and the positive sheilding was melted in places... so needless to say I ripped that out, and ran new, putting in a fuse and also slapping a board (like I did on the starboard side) on the vertical portion of the inside of the lazarette to provide a place for me to "clip" the wire. I just used pine on both sides, and will be clear-coating it. But this gets the charging wires off the floor (yep they were on the floor)... and how scary is that right next to the fuel tank? Someone had a death wish.
At the end of this weekends "cleaning up all small projects," I vacuumed up the dust over the whole cockpit, and deck and dropped the trailer off the jackstands, and secured bow and stern lines again. I am HOPING that I can drag the boat out tomorrow (rather today Monday) so that I can give the deck a proper washing. all the lines are off deck right now, as is the mast, so it's an "easy clean." This will also give me a chance to sweep the pole barn clean.
Forgot to say, I took the outboard and slapped it on the motor mount, so I could work on it... I removed the wires from the alternator, so I could run new (they were getting soft, and I was worried they were going to short. Checked plugs (they look nearly new), and I'll be taking apart the lower unit to get to the impeller for replacement as well... I hate outboard work, but its gotta be done.
Maybe I'll be able to get a decent outdoor picture of her after she's clean... boy it'd be nice to get a couple warm days to finish my gelcoating. I'm pretty pleased so far with the match there, can't wait to see what I can do with the port side.
The wind transducer cable was run up the mast... It looks off center in this picture but I've measured it against centerline and it's fine... Note I pulled the anchor light to get to the bolts. I wound up cutting a 1" x 3/4" rectangle hole directly below this vane mount, so that I could reach in and grab the main halyard (my feeder line). I used the main halyard to pull through a smaller diameter twine in its place (and I looped it top to bottom so it was continuous)... I used a set of forecepts to reach into the hole in the top of the mast to grab the small diameter line, up through the new rectangle hole. This particular mount runs the cable through the center, and out the back, the vane then has a 12 inch arm that clicks into place.
Here's a Mr. Fuzzycam picture of the masthead in place. You might notice I've sanded the mast and am ready for a 2nd coat of paint.
Closeup... of the masthead, you'll see the new LED anchor light.. this is before I secured the coax for the VHF...
This is all I did for the exit location at the bottom of the mast... I'll admit that I was nervous cutting the SIMNET cable since replacing the 50ft cable is about $100... but this is a trailer sailor after all and there has to be a way to "disconnect."
By the way, I tested the anchor light using my ATV battery (about 4 feet from the base of the mast) to make sure it works.. none of the pictures turned out, but it's bright, and it's a nice yellow/white like the original incandescent, the Dr. LED, perko anchor light bulb from catalinadirect.com was a good match.
The original wiring through the hull of the boat for the mast was retro-fitted with a 4-way trailer plug connector, and then someone later added the VHF... I managed to place the transducer wire (simnet) through the deck between the two (and seemingly out of the way), which puts the cable behind the daggerboard trunk, on the starboard V-berth bulkhead... Here's a shot of the deck (again shiny one in the middle is new):
Here's a shot of the cabin side. I used 5200 under the through deck fitting, as well as screws...
You have to ask yourself, what I did to connect the now cut cable (simnet), and as it turns out simnet is NMEA2000 "similar," which basically shares the same wires, just different connectors (actually smaller connectors)... so what I bought was Maretron Micro Field Connectors. I bought 1 male and 1 female connectors and the wire colors matched exactly. http://www.defender.com/product3.jsp?pa ... &id=750951
The result was pretty good.
By the way somewhere during all this, I waxed the starboard side hull... It turned out better than I expected, but I can't seem to get a decent shot of it.
After all of this I stumbled across my charging circuit from my outboard. I noted that the person who ran the wire didn't put an inline fuse in it... or a disconnect... What is worse (and scary) is the wire (which I used myself) was apparently shorted at one point and the positive sheilding was melted in places... so needless to say I ripped that out, and ran new, putting in a fuse and also slapping a board (like I did on the starboard side) on the vertical portion of the inside of the lazarette to provide a place for me to "clip" the wire. I just used pine on both sides, and will be clear-coating it. But this gets the charging wires off the floor (yep they were on the floor)... and how scary is that right next to the fuel tank? Someone had a death wish.
At the end of this weekends "cleaning up all small projects," I vacuumed up the dust over the whole cockpit, and deck and dropped the trailer off the jackstands, and secured bow and stern lines again. I am HOPING that I can drag the boat out tomorrow (rather today Monday) so that I can give the deck a proper washing. all the lines are off deck right now, as is the mast, so it's an "easy clean." This will also give me a chance to sweep the pole barn clean.
Forgot to say, I took the outboard and slapped it on the motor mount, so I could work on it... I removed the wires from the alternator, so I could run new (they were getting soft, and I was worried they were going to short. Checked plugs (they look nearly new), and I'll be taking apart the lower unit to get to the impeller for replacement as well... I hate outboard work, but its gotta be done.
Maybe I'll be able to get a decent outdoor picture of her after she's clean... boy it'd be nice to get a couple warm days to finish my gelcoating. I'm pretty pleased so far with the match there, can't wait to see what I can do with the port side.
Re: Rambling repair post...
Pulled the boat out for a quick bath... swept the pole barn...
Port side... nothing done yet... no compound, polish, or wax... blue tape marks a mismatched gelcoat repair, that I'm going to address.

Here's the starboard side after compound/polish/wax Deck needs a heavy clean... but, its getting there.

Port side... nothing done yet... no compound, polish, or wax... blue tape marks a mismatched gelcoat repair, that I'm going to address.
Here's the starboard side after compound/polish/wax Deck needs a heavy clean... but, its getting there.
Re: Rambling repair post...
Ok, name went on, I guess I am stuck with it now...

Reg numbers went on

some requirements posted inside.

Organized the tools for the boat... new rig cutters (hand tool size) included.

I was going to avoid this critical yearly step, but I finally relented and took a look, boy am I glad I did... lower unit removed from the outboard, impeller was missing a fin (found all the parts).. two other vanes were split.

So I'm getting there. Oh and I put another coat of paint on the mast, spreaders, and boom (no pictures)... will wait until dry, then flip and do a 2nd coat on that side as well.
Oh we've been busy, so the boat work was put on hold. Our field trial season has started. My 18yo horse has been have intermittent lameness issues, and we wanna get that sorted out... Wife has 2 horses, her steady eddie horse, and a new one... But given my horses new health issues, we both thought we needed a "spare," so here's my new boy, registered Tennessee walking horse "Collectors Tex," aka "Scout":

Reg numbers went on
some requirements posted inside.
Organized the tools for the boat... new rig cutters (hand tool size) included.
I was going to avoid this critical yearly step, but I finally relented and took a look, boy am I glad I did... lower unit removed from the outboard, impeller was missing a fin (found all the parts).. two other vanes were split.
So I'm getting there. Oh and I put another coat of paint on the mast, spreaders, and boom (no pictures)... will wait until dry, then flip and do a 2nd coat on that side as well.
Oh we've been busy, so the boat work was put on hold. Our field trial season has started. My 18yo horse has been have intermittent lameness issues, and we wanna get that sorted out... Wife has 2 horses, her steady eddie horse, and a new one... But given my horses new health issues, we both thought we needed a "spare," so here's my new boy, registered Tennessee walking horse "Collectors Tex," aka "Scout":
Re: Rambling repair post...
Field trial season in full swing and I haven't done much work on the boat. but a new skill is learned as of yesterday (yep I had never done it)... I eye spliced some VPC... New fid, and pusher purchased to learn the skill. Yeah first one is pretty rough looking, but I've since smoothed it out some and I think it'll be fine. Pretty excited now to buy 2 other halyards for the mast. New running rigging for this boat was a big deal to me.

Lots of little projects left yet, 3 weeks to splash... I have a large gelcoat patch yet, another layer of gelcoat on the seat, and non-skid... couple of tweaks to the hatchboards... Then there is water pump on the motor, and secure the battery, the head, the fuel tank, and put the whole she-bang back together and ready for travel. Sounds easy right?
Oh yeah, new bearing buddy for the trailer, top off grease, install a new winch on the trailer, and a bow support. just a few things right?
OH after splash, new boom-kicker rods.
Re: Rambling repair post...
I did a little work on the hull yesterday... No pictures. I put another layer of gelcoat on the port cockpit seat. I am taking the lazy approach to non-skid on the seat. I'll take pictures when/if I do that on coat #3.
I also put a coat of gelcoat on the huge port side repair that didn't match... I also patched various spots on the boat that needed repairs. No pictures... Will take them after I sand.
Last thing I did was finish off my other 2 halyards, genoa and spin... I'm getting better at this. This is probably all old hat to you guys, but learning to eye-splice double-braid was a big deal to me.

I did use a good video to learn it... from NER... They use 1/2" poly double braid, and honestly its NOT nearly as easy as he shows on VPC, but it's still fully functional.
Link to the video here.
https://youtu.be/UghIS9xdiDw
I also put a coat of gelcoat on the huge port side repair that didn't match... I also patched various spots on the boat that needed repairs. No pictures... Will take them after I sand.
Last thing I did was finish off my other 2 halyards, genoa and spin... I'm getting better at this. This is probably all old hat to you guys, but learning to eye-splice double-braid was a big deal to me.
I did use a good video to learn it... from NER... They use 1/2" poly double braid, and honestly its NOT nearly as easy as he shows on VPC, but it's still fully functional.
Link to the video here.
https://youtu.be/UghIS9xdiDw
Re: Rambling repair post...
Impeller installed, and mounted back again. Aligning that darned 7.5hp motor, gear-shift, water tube, and drive shaft is a real PITA... Just an FYI... and there is no gear shift retention screw on that model.

Re: Rambling repair post...
I'm finally tidying up my port cockpit seat... I am not totally excited about the quality of job, but I am not disappointed either. I think with practice I could get good at this work... but as with everything I do, its just kind of me thrashing at it. It's totally functional, and looks OK. That's about the same level as my painting... Oh well.
Masking for nonskid:

Result looks to have just the right amount of "teeth." yeah the lighting stinks.

Well, I also put another layer on the port side of the boat. I'll be sanding it when it dries, then 320 grit, then 600 wet sand, then compound, polish and wax... I'm about done with dealing with this garbage...
Oh I just received my new pinstripes for the boat, I went with black over blue, same width as the one on there before. My intent is to cover the old pinstripe shadow that won't go away.
With that, then I install a bow keel roller to the trailer, a new bearing buddy, regrease all the bearings and check for bad races... then I have caps going on all the bearing buddies.
Then install the traveler, and get the mast back on board (I'll be making a bow pulpit mast support out of 2x4)... I'm also going to stain/seal my mast upper, and mast support, cause I think I like my design well enough now, I always get them right, and forget to protect the wood.
Slowing coming together folks... just a few more small jobs and I'm done.
Masking for nonskid:
Result looks to have just the right amount of "teeth." yeah the lighting stinks.
Well, I also put another layer on the port side of the boat. I'll be sanding it when it dries, then 320 grit, then 600 wet sand, then compound, polish and wax... I'm about done with dealing with this garbage...
Oh I just received my new pinstripes for the boat, I went with black over blue, same width as the one on there before. My intent is to cover the old pinstripe shadow that won't go away.
With that, then I install a bow keel roller to the trailer, a new bearing buddy, regrease all the bearings and check for bad races... then I have caps going on all the bearing buddies.
Then install the traveler, and get the mast back on board (I'll be making a bow pulpit mast support out of 2x4)... I'm also going to stain/seal my mast upper, and mast support, cause I think I like my design well enough now, I always get them right, and forget to protect the wood.
Slowing coming together folks... just a few more small jobs and I'm done.
Re: Rambling repair post...
Ok, well no good pictures of it complete, but I managed to replace my one missing bearing buddy, pack it with grease, and cap all the bearing buddies (they made a mess when last I added grease cause the rubber covers were missing from them)...
Keel roller goes on soon.
Here's the parts (and more keep rolling in daily). I have lev-o-gauges, boom kicker springs, spinnaker launch bag, and safety stuff yet to buy, and I'll be ready for the season.

I had to clean out the pole barn some, we've run out of hay for the horses, and I thought it was the only time I'd get to make more room for hay, and clean up the old hay.... so
But we have room for hay now (by the way the hay is the reason my paint jobs keep turning out poorly - yeah that's the reason).. Hopefully we have enough room to store 5 months of hay for 4 horses now.... given that we are out now (Late April, and we need to make it to late May - we best store more hay).

Keel roller goes on soon.
Here's the parts (and more keep rolling in daily). I have lev-o-gauges, boom kicker springs, spinnaker launch bag, and safety stuff yet to buy, and I'll be ready for the season.
I had to clean out the pole barn some, we've run out of hay for the horses, and I thought it was the only time I'd get to make more room for hay, and clean up the old hay.... so
But we have room for hay now (by the way the hay is the reason my paint jobs keep turning out poorly - yeah that's the reason).. Hopefully we have enough room to store 5 months of hay for 4 horses now.... given that we are out now (Late April, and we need to make it to late May - we best store more hay).
Re: Rambling repair post...
Ok, back to actual work having been done.
Keel support in... The issue is the bow wouldn't easily come up when trying to align the boat to the winch... this should force the bow up, to align it properly with the winch during retrieve.

New halyards in...

Hard to tell from this picture, but I added 1/4" starboard to the crib boards, as the way I fixed the companionway, added another 1/4" to the thickness of the channel. This means 3/4" teak plywood would wobble around in there, not good. My ultimate goal is actually to buy 1" starboard in white, or perhaps smoked lexan, and add spacers to the track (haven't decided) to replace the crib boards. But that's longer term this is the short term solution.
I didn't get any pictures of the port side, it's not perfect, but it's better than it was. I have to wet sand, compound, polish and wax it yet (ugh)...
Also I spliced another line, this time, just sta-set, for the pole topping lift, that's all the lines in the mast replaced.

I'm getting there, no really I am.
Keel support in... The issue is the bow wouldn't easily come up when trying to align the boat to the winch... this should force the bow up, to align it properly with the winch during retrieve.
New halyards in...
Hard to tell from this picture, but I added 1/4" starboard to the crib boards, as the way I fixed the companionway, added another 1/4" to the thickness of the channel. This means 3/4" teak plywood would wobble around in there, not good. My ultimate goal is actually to buy 1" starboard in white, or perhaps smoked lexan, and add spacers to the track (haven't decided) to replace the crib boards. But that's longer term this is the short term solution.
I didn't get any pictures of the port side, it's not perfect, but it's better than it was. I have to wet sand, compound, polish and wax it yet (ugh)...
Also I spliced another line, this time, just sta-set, for the pole topping lift, that's all the lines in the mast replaced.
I'm getting there, no really I am.
Re: Rambling repair post...
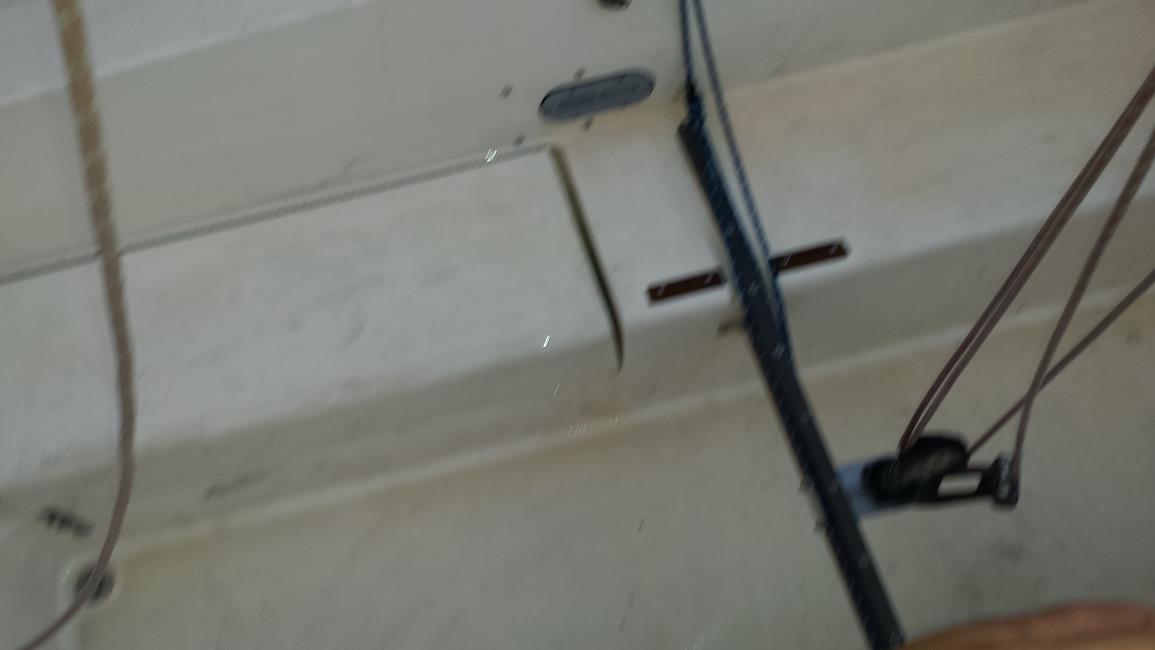
Well the traveler is back on.

So here are the hatchboards from before.

So is the mast.. with new pulpit mast support...

Jumble of new running rigging, showing the pulpit support:

Spinnaker pole mounted ON deck...

Oh, and after motor put back together, I hooked up some fuel, and had to test the pump.... motor running great:
http://youtu.be/IaJjADV_nUE
So here are the hatchboards from before.
So is the mast.. with new pulpit mast support...
Jumble of new running rigging, showing the pulpit support:
Spinnaker pole mounted ON deck...
Oh, and after motor put back together, I hooked up some fuel, and had to test the pump.... motor running great:
http://youtu.be/IaJjADV_nUE
Re: Rambling repair post...
tractoring it out of hibernation.... literally. Way easier to use the tractor than the pickup... allows me to fit the boat next to the barn, cause the tractor turns on a dime.

slowly gonna compound polish and wax.

slowly gonna compound polish and wax.
Re: Rambling repair post...
Pinstriping the port side... yes the port side is "Better" but still not good... I'm going to leave doing 2 more layers of gelcoat until next winter because I want to "redo" what I did... I didnt' get a smooth enough finish on it so I need to sand down more and do another coat... it's workable now, but not great. Its all below the pinstripe (and I have enough pinstripe to do 2 more boats), so its not really a big issue.

This is a better shot of the port side, the gray areas are just dirt still on the hull from compounding, it should get better, with cleaning and waxing.

Starboard side...

I have drinkholders, lev-o-gauges, and a cascading backstay (parts arrive today) to do yet, and then I am ready. My tow vehicle is 200 miles away in the shop, I think I blew the Transmission Control Module on it, towing our horses (4) back from the weekend. Horses, trailer, and tow vehicle are out in western PA, we hope to hear today that they can repair the tranny, but this gives me the time I want to finish up the boat more properly (I'd be tempted if the truck were home to just splash the thing and be done).
I'll take shots of the cascaded backstay once I get it all rigged. I likely will step the mast at home, to make sure everything that I need is on the boat (since the boat was really torn apart).
Last foot note here... my foot blocks are less than 1/4" high. I got 3" high blocks of teak (4) to use for new foot blocks. I was thinking of installing them but hesitated because that 3" high will be a real pain in the thigh if they are too tall.. what is a proper/good height for foot blocks? I have them in the stock location on either side of the traveler fore and aft, probably takes up 6" on either side. This is a terrible picture, but you get the idea from it (right now these exact 2 foot blocks are MIA, cause I rebuilt this whole seat)... I figured if I had to drill new holes, maybe I ought to replace the foot blocks.
This is a better shot of the port side, the gray areas are just dirt still on the hull from compounding, it should get better, with cleaning and waxing.
Starboard side...
I have drinkholders, lev-o-gauges, and a cascading backstay (parts arrive today) to do yet, and then I am ready. My tow vehicle is 200 miles away in the shop, I think I blew the Transmission Control Module on it, towing our horses (4) back from the weekend. Horses, trailer, and tow vehicle are out in western PA, we hope to hear today that they can repair the tranny, but this gives me the time I want to finish up the boat more properly (I'd be tempted if the truck were home to just splash the thing and be done).
I'll take shots of the cascaded backstay once I get it all rigged. I likely will step the mast at home, to make sure everything that I need is on the boat (since the boat was really torn apart).
Last foot note here... my foot blocks are less than 1/4" high. I got 3" high blocks of teak (4) to use for new foot blocks. I was thinking of installing them but hesitated because that 3" high will be a real pain in the thigh if they are too tall.. what is a proper/good height for foot blocks? I have them in the stock location on either side of the traveler fore and aft, probably takes up 6" on either side. This is a terrible picture, but you get the idea from it (right now these exact 2 foot blocks are MIA, cause I rebuilt this whole seat)... I figured if I had to drill new holes, maybe I ought to replace the foot blocks.
Re: Rambling repair post...
Thanks to Tom and Hot Tomale's website, the cascaded backstay design, I made a new flicker, amsteel backstay, and rigging... Pretty cool, did it all tonight in about 4 hours.
Here are some of the parts.

Oh but first, important addition to racing package for the boat...

Flicker installed and being tested here...

Another shot....

Rigged all up and ready to roll...

Observant people might notice that not only did I rig up the backstay, but I installed the traveler line (continuous of course)...

Oh yeah... that completes my work for this winter.. I have some waxing yet to do, and I need to apply the club number to the hull (6" high "57"), but otherwise I'm good to go... can't wait to splash now. Also my tow vehicle is fixed and we're going to go get it (400 miles round trip) tomorrow... oh and the 31 foot long horse trailer and 4 horses are out there too.
Here are some of the parts.
Oh but first, important addition to racing package for the boat...
Flicker installed and being tested here...
Another shot....
Rigged all up and ready to roll...
Observant people might notice that not only did I rig up the backstay, but I installed the traveler line (continuous of course)...
Oh yeah... that completes my work for this winter.. I have some waxing yet to do, and I need to apply the club number to the hull (6" high "57"), but otherwise I'm good to go... can't wait to splash now. Also my tow vehicle is fixed and we're going to go get it (400 miles round trip) tomorrow... oh and the 31 foot long horse trailer and 4 horses are out there too.